If you’re stuck unraveling the chilling mysteries of Tormented Souls 2, you’ve come to the right place. This Tormented Souls 2 puzzle guide details every puzzle, required items, exact locations, and step-by-step solutions to help you progress through the game’s haunting environments—from the eerie Convent to the blood-soaked Processing Plant, the abandoned School, the cursed Cemetery, and the secret Bunker.
Whether you’re hunting for the Good Ending or just trying to survive the next room, this walkthrough ensures zero spoilers beyond what’s necessary to solve each puzzle.
🏯 Convent Puzzles
1. Flower Lock
- Location: Convent Infirmary
- Items Needed: Christ Book, Thumbtack
- Solution:
- Combine the Thumbtack (from corkboard) with the Christ Book (next to stretcher).
- Use the modified book on the flower-shaped lock.
2. Lighter in Corpse
- Location: Convent Bell Tower (Bottom)
- Items Needed: Pliers
- Solution:
- Use Pliers (from Staff Room, F1) on the cage around the corpse to retrieve the Lighter.
3. Elevator Power
- Location: Convent North Corridor
- Items Needed: None
- Solution:
- Find the power box opposite the Lady Chapel door and restore power.
4. Padlocked Door to Courtyard
- Location: Convent North Corridor
- Items Needed: Hammer
- Solution:
- Use Hammer (from Crematorium, basement) on the padlock to break it open.
5. Bell Tower Glass (Shotgun)
- Location: Convent Bell Tower (Top)
- Items Needed: Hammer
- Solution:
- Hit the bells in this order (based on size):
3 → 1 → 4 → 2
(3 = third largest, 1 = largest, etc.) - Hint found on plaque below glass casing.
- Hit the bells in this order (based on size):
6. Gallows Puzzle
- Location: Convent Courtyard
- Items Needed: Hammer, Pliers
- Solution:
- Pull lever to drop torso → use Pliers (Staff Room, F1) to extract Saw Blade.
7. Frozen Hand
- Location: Convent Kitchen
- Items Needed: Saw Blade, Saw Handle
- Solution:
- Combine Saw Blade (Courtyard) + Saw Handle (Refectory, behind moveable shelves).
- Use completed saw on Frozen Hand.
8. Melting the Frozen Hand
- Location: Convent Kitchen
- Items Needed: Lighter
- Solution:
- Light oven with Lighter → place frozen hand on stove → melt to reveal Cryptex.
9. Cryptex Puzzle
- Location: Convent Kitchen
- Items Needed: Chess Paper
- Solution:
- Examine back of Chess Paper (from Calefactory).
- Match line shapes to chess pieces:
- L-shape = Knight
- Straight line = Rook, etc.
- Solving yields Crown Key.
10. Crown Lock
- Location: Convent Basement
- Items Needed: Crown Key
- Solution:
- Use Crown Key (from Cryptex) to unlock basement door → access Prison.
11. Prison Cell Power
- Location: Convent Prison
- Items Needed: Pliers
- Solution:
- Use Pliers on fuse box → set dials to: \ / / / \
- Hint found in one of the prison cells.
12. Cursed Book
- Location: Convent Prison
- Items Needed: Christ Book
- Solution:
- Swap Cursed Book with Christ Book → deliver cursed book to Joseph in Crematorium.
13. Telephone / Jade Disc
- Location: Convent Library
- Items Needed: Old Telephone Dial, Yellow Page
- Solution:
- Attach dial to phone base → enter code: 3890*
- Jade Disc appears behind nearby painting.
- Code derived by aligning lines on both sides of Yellow Page (from basement).
14. Jade Cross
- Location: Convent Calefactory Room
- Items Needed: Jade Disc, Jade Cross
- Solution:
- Combine Jade Disc + Jade Cross (from museum, behind stairs).
- Press buttons in order: RIGHT → DOWN → LEFT → RIGHT → RIGHT
- Creates closed circuit → unlocks Chapter House door.
15. Museum Door
- Location: Convent Museum
- Items Needed: Museum Key
- Solution:
- Use key on three star bolts: Middle → Right → Left
- Then pull handle to slide door open.
- Museum Key obtained after delivering Cursed Book to Joseph.
16. Padlocked Door in Torture Chamber
- Location: Convent Torture Museum
- Items Needed: Hammer
- Solution:
- Use Hammer on padlock to break it.
17. Teleport Mirror
- Location: Convent Torture Museum
- Items Needed: Lighter, Hammer
- Solution:
- Break padlock with Hammer → light candles in this pattern:
- X 0 0 0
- 0 X 0 X
- X X X
- Hint from portrait of woman in museum.
18. Torture Chamber Stretcher
- Location: Convent Torture Museum (Other Side)
- Items Needed: Lighter
- Solution:
- Light mirror candles → enter Hell World → use turn handle on stretcher to rip scarecrow → return to normal world → collect Shotgun Pipe.
19. Angel Statue
- Location: Convent Museum
- Items Needed: Lighter, Angel Heart (Stone Heart)
- Solution:
- In Hell Museum, burn scroll with Lighter.
- Use second mirror → access secret area → get Stone Heart from bronze bull.
- Return to Angel Statue → place heart → fills font with blood.
20. Blood-Filled Atomiser
- Location: Convent Museum
- Items Needed: Plant Sprayer
- Solution:
- Use Plant Sprayer (from Chapter House) on blood-filled font.
- Pump 3 times to pressurize.
21. Cursed Door (North Corridor)
- Location: Convent North Corridor
- Items Needed: Blood-Filled Plant Sprayer
- Solution:
- Spray blood on door to remove curse/blockage.
🏙️ Town & Mall Puzzles
22. Mall Back Entrance Lock
- Location: Town Commercial District
- Items Needed: Mall Back Entrance Key
- Solution:
- Key found on dead body nailed to wall in Butcher’s Shop lower area.
23. Arcade Machine
- Location: Mall Arcade
- Items Needed: Arcade Coin, Box Cutter
- Solution:
- Restore power → insert coin (from Town phone) → play claw machine.
- Win Bear → use Box Cutter (from locked gym, Mall F3) to open → get Gold Ring.
- Give ring to Chained Man in Mall Lower Level.
24. Pharmacy Mini Fridge
- Location: Mall Pharmacy
- Items Needed: Pharmacy Polaroid
- Solution:
- Flip Polaroid (lower pharmacy) → add numbers → match to color combo: Blue, Yellow, Red.
25. Town Telephone
- Location: Town Commercial District
- Items Needed: Box Cutter
- Solution:
- Cut tape off ringing phone → receive Arcade Coins.
🏭 Processing Plant Puzzles
26. Hidden Room (Save Anna)
- Location: Processing Plant Freezer
- Items Needed: None
- Solution:
- After row of freezers, press portrait on chest.
- Hint: “Press the heart of the person dearest to me” (from diary outside).
27. Open Vent – Save Anna (Past)
- Location: Processing Plant Freezer (Past)
- Items Needed: VHS Tape
- Solution:
- Use VHS Tape (from present-day freezer bed) on Projector (Conference Room).
- In past, move wardrobe in front of vent to block it → Anna survives in present.
28. Escape the Room
- Location: Processing Plant Freezer
- Items Needed: Nailer
- Solution:
- Look through door slot → shoot Nailer to press button → door opens.
29. Accessing the Elevator
- Location: Processing Plant Reception
- Items Needed: Lightbulb
- Solution:
- Insert Lightbulb (from Anna’s room) → turn on light → smash boxes with Crowbar.
30. Elevator Power (Docks)
- Location: Processing Plant Underground Docks
- Items Needed: None
- Solution:
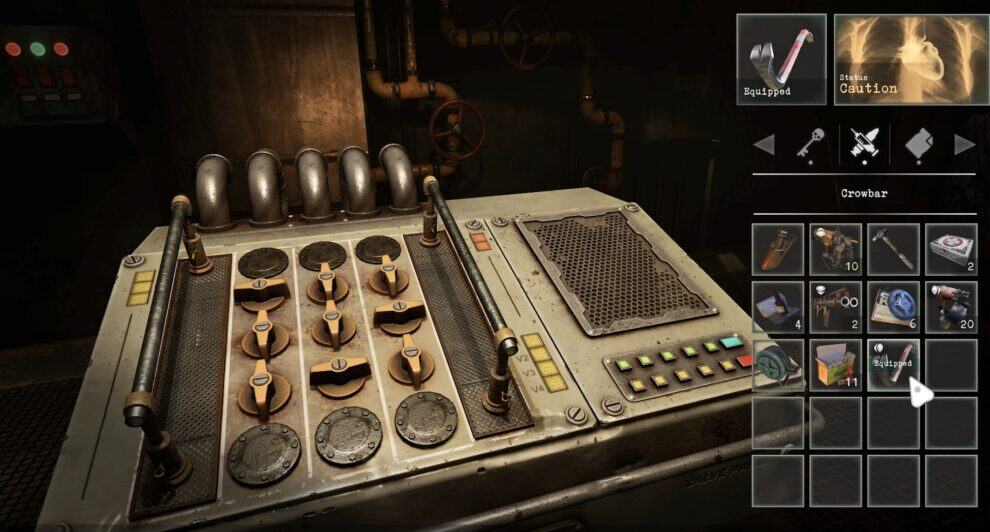
- Turn dials: Dial 2 = 1 spin, Dial 3 = 3 spins.
31. Passcoded Door (2F)
- Location: Processing Plant Corridor 2F
- Items Needed: Batteries
- Solution:
- Take Batteries from cassette player (Docks).
- Enter code: 1765 (found in Surveillance Room; 6 is upside down).
32. Voice-Activated Lock
- Location: Processing Plant Basement Corridor
- Items Needed: Batteries, Cassette Tape – Confession, Cassette Player
- Solution:
- Reinstall batteries → play Confession Tape → when voice says “long pig”, press red button on lock.
33. Moving Cages (Warehouse)
- Location: Processing Plant Warehouse
- Items Needed: None
- Solution:
- Use control panel to clear path:12340 X X X 0 0 0 0 X 0 0 0 X 0 0 0
34. Other Side Mirror (Warehouse)
- Location: Processing Plant Warehouse (Lower Level)
- Items Needed: Lighter
- Solution:
- Light candles based on clock times: 3:00, 2:45, 2:20 → pattern:12340 0 0 0 X X 0 X 0 0 0 0
35. Waste Disposal Furnace
- Location: Processing Plant Factory (Other Side)
- Items Needed: Mutant Toy
- Solution:
- Place Mutant Toy in furnace → return to normal world → close door → ignite.
- Gas switch order:
Bottom Left → Top Middle → Bottom Middle → Middle Left → Middle Right → Top Right → Top Left → Bottom Left
36. Four Portraits (Mechanical Jack)
- Location: Processing Plant Dining Room
- Items Needed: Crossbow, Lighter, Hammer
- Solution:
- Perform actions in front of each portrait:
- Lighter (hold up)
- Crossbow (aim)
- Hammer (swing)
- Spin in circle (tank controls)
- Statue releases Mechanical Jack.
- Perform actions in front of each portrait:
37. Hanging Shark
- Location: Processing Plant Underground Docks
- Items Needed: Mechanical Jack, Crowbar
- Solution:
- Use Crowbar to pry mouth slightly → insert Mechanical Jack to fully open → get Triangle Keycard.
38. 3x Keycards (Factory Kitchen)
- Location: Processing Plant Factory Kitchen
- Items Needed: Eye, Spiral, Triangle Keycards
- Solution:
- Insert each in matching slot → press each button 3 times to unlock door.
⚰️ Cemetery Puzzles
39. Old Mausoleum
- Location: Cemetery Grounds
- Items Needed: Club Key
- Solution:
- Key hangs from tree → unlocks mausoleum → get Outer Constellation Star Piece.
40. Animal Pieces & Reliquary
- Location: Cemetery Grounds
- Items Needed: Bat, Dog, Turtle, Bird Dials
- Solution:
- Insert in order (per hint): Bird → Turtle → Bat → Dog
- Rotate to: 1, 4, 4, 7 → obtain Hand Cannon.
41. Star Constellation
- Location: Cemetery Entrance
- Items Needed: Constellation Center Piece, Disc
- Solution:
- Combine pieces → align to Gemini plaque:
- Outer: 5 turns
- Middle: 2 turns
- Center: 7 turns
- Insert into statue base → unlock Gemini Mausoleum.
- Combine pieces → align to Gemini plaque:
42. PEDRO Grave
- Location: Cemetery Grounds
- Items Needed: Gold, Silver, Bronze Octagons, Metal Detector
- Solution:
- Use Metal Detector to find pieces → arrange: Gold → Silver → Bronze to spell PEDRO.
43. The Four Horsemen
- Location: Cemetery Burial Chamber
- Items Needed: Marble Sword
- Solution:
- Set sword directions per painting:
- Victory: 12 o’clock
- War: 6 o’clock
- Death: 11 o’clock
- Famine: 3 o’clock
- Set sword directions per painting:
🏫 School Puzzles
44. Xylophone / Beethoven Statue
- Location: School East Corridor B
- Items Needed: Spoon, Xylophone, Music Sheet
- Solution:
- Play notes: F-A-C-E-D-E-A-D on xylophone → get 7A Fuse.
45. Helena Cabinet
- Location: School Classroom 102
- Items Needed: Helena’s Note
- Solution:
- Rotate dials in order: Book → Ruler → Compass → Sharpener.
46. Fuse Board
- Location: School Generator Room
- Items Needed: Fuse 7A, Second Fuse
- Solution:
- Swap fuses to power different areas (elevator, doors).
47. Computer Lab Key
- Location: School Basement
- Items Needed: None
- Solution:
- Found in Textiles Classroom.
48. Teacher’s Request – Snake Figurine
- Location: School Classroom 103
- Items Needed: Apple Seeds, VHS Tape – Playground
- Solution:
- Plant seeds in past (via VHS) → water → return to present → get apple → give to teacher.
49. Mirror to Other Side (Girl’s Restroom)
- Location: School Girl’s Restroom
- Items Needed: Lighter
- Solution:
- Light candles using math hints on mirrors:1230 X 0 X 0 X 0 0
50. Fly Figurine
- Location: School Girl’s Restroom
- Items Needed: Insecticide Can, Insecticide Sprayer
- Solution:
- Combine → spray flies in Other Side toilet → get Fly Figurine.
51. Birdcage & Other Side Safe
- Location: School Classroom 202 (Other Side)
- Items Needed: None
- Solution:
- Set dials to opposites: Grenade, Fire, Male, Sun, Happy Mask.
52. Animal Figurines (Master Key)
- Location: School Science Lab
- Items Needed: Fly, Hawk, Toad, Snake Figurines
- Solution:
- Place in order: Hawk → Snake → Toad → Fly (based on “strong eat weak”).
- Yields Master Key.
53. Master Lock 1 & 2
- Locations: Director’s Office, Computer Lab
- Items Needed: Master Key
- Solutions:
- Director’s Office: Set to Circle, Crown of Thorns, ♀, †, ⏾
- Computer Lab: Set to ☼, ♡, ♂ → get Recoil Spring
54. Cursed Door / Janitor’s Room TV
- Location: School Janitor’s Room
- Items Needed: Pig Mask
- Solution:
- Defeat Pig Cook Boss → get mask → give to hand in TV.
⛪ Church & Bunker Puzzles
55. Church Entry Gate
- Location: Town Commercial District
- Items Needed: Master Key
- Solution:
- Set symbols: Heart (Rose), YinYang (Fighter), Star (3 Wise Men).
56. Elevator Power (Church)
- Location: Church
- Items Needed: Rubber Hose, Pliers
- Solution:
- Connect pipes with Hose → secure with Wire → tighten with Pliers.
57. Mirror to Other Side (Church)
- Location: Church
- Items Needed: Lighter
- Solution:
- Light all candles except those depicting Jesus weighed down by cross.
58. Eye Door
- Location: Church Undercroft
- Solution:
- In Other Side, extinguish candles → return to normal → stand in darkness until Eye lights up → door opens.
59. Puppet Virus
- Location: Bunker Entrance
- Items Needed: None
- Solution:
- Mix: Red = 6, Yellow = 1, Green = 2 → inject Caroline.
- Wrong amounts = Game Over.
60. Generator Power (Bunker)
- Location: Bunker Generator Room
- Items Needed: Spark Plug
- Solution:
- Insert plug → flip switch → pull lever.
61. Keycard Door (Bunker)
- Location: Bunker Rotunda Corridor
- Items Needed: Laboratory Keycard
- Solution:
- Found on worker in Incinerator (B3).
62. Filled Syringe
- Location: Bunker Subject Containment
- Items Needed: Empty Syringe
- Solution:
- Fill syringe from mutation tank.
63. Projector to Past (Bunker)
- Location: Bunker Containment Ward
- Items Needed: VHS Tape
- Solution:
- Use tape → inject Filled Syringe into IV bag in past.
64. Curing the Virus
- Location: Bunker Laboratory (Past)
- Items Needed: Filled Syringe
- Solution:
- Use syringe on Caroline’s IV bag → cures her in present.
🌟 Good Ending Requirements
To unlock the Good Ending, complete these optional puzzles:
- Refectory Cracked Wall (Convent):
- After returning from Lucia, use Sledgehammer (from Joseph’s cave) on broken wall in Refectory.
- Save Miguel (School Director’s Office – Other Side):
- Use Duct Tape (from Convent dormitories) on robot’s neck in Other Side → saves Miguel in present.
🔚 Final Thoughts
With this complete Tormented Souls 2 puzzle guide, you’ll never be lost in the darkness again. Each solution is verified for accuracy and optimized for quick reference.
Pro Tip: Save often—some puzzles are one-shot (like the Puppet Virus).
If you found this guide helpful, share it with fellow survivors! And remember: trust nothing… especially the mirrors.
